How to Create Surreal Images Using Basic Photoshop Skills


Most of the things I know about photography and photo editing were learned at a site called DPChallenge. For years I’ve been trying to compete against members whose all-round skills leave me in awe. A top ten finish in one of their challenges is a rare delight.
The photo I’ve used to illustrate this tutorial is a recent creation which actually made it into the top ten. No advanced editing skills are required to create images of this type.
My original unedited photo looked like this.
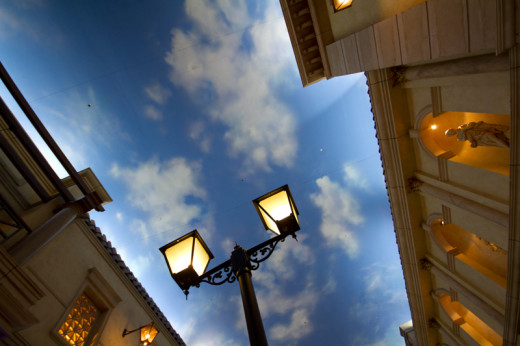
It’s not a very interesting photo but it was always intended to be part of the surreal composition I created and it served its purpose well.
It had a few problems that needed fixing though. The colors were dull and lacking in contrast as, contrary to appearances, it was taken in bad light. The “sky” is actually a painted ceiling.
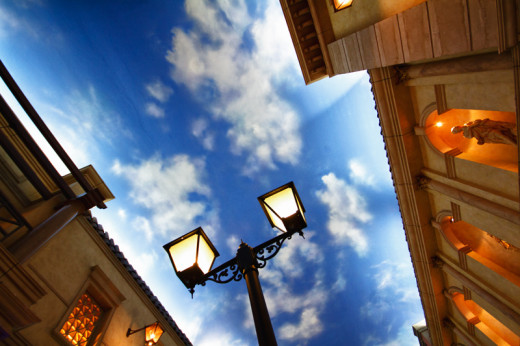
Fixing the contrast and saturation are fairly basic editing skills and didn’t take much time or effort.
I also distorted the image a bit to get rid of the annoying slightly bent line on the right hand side.
My biggest problem was a few black lines and spots which spoilt the overall effect. Cloning these out was a bit more time consuming, but this step could have been avoided by choosing better source material. If cloning is required, it is important to do it at this stage rather than later to ensure perfect symmetry.
After these basic steps were taken care of, the photo now looked like this.
Now comes the fun part. Best of all, it’s really simple.
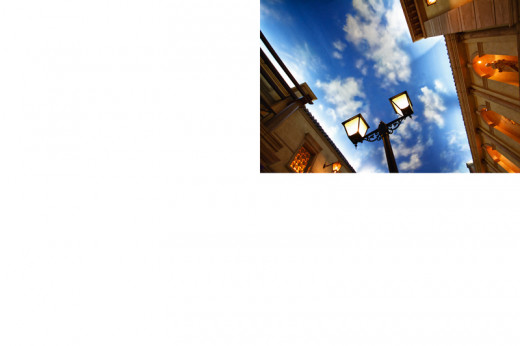
(Unless your computer is really powerful you may want to reduce the resolution of your image before you go any further.)
The first step is to increase the size of your canvas. You may want to duplicate your image only once, or you may want more copies. I have created four copies of the original, so I doubled both the height and the width of the photo. Before this you need to know where you want the center of your image to be. My center is the bottom left corner, so, when I increased the canvas size, the image was locked to the top right corner of the new canvas. Make sure that the canvas extension color is set to white.
After this step my image looked like this.
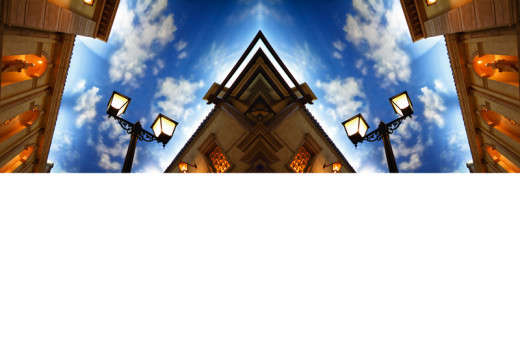
Once you have done this, duplicate your background layer.
Your next step is to flip the new layer horizontally. Change the layer blend mode to darken so that the background layer shows through, and then flatten your image.
My image now looked like this.
You’re almost there now. Just duplicate your background layer once more. This time you will flip the new layer vertically. Once again you must change the layer blend mode to darken and flatten your image. And you’re done.
It really is as simple as that.
Note:
While I use Photoshop CS5, this image can be created in more basic programs like Photoshop Elements or even a free program like Gimp. Some of the terms used may differ slightly, but all the tools you require are there.
Thanks for your time and happy editing.


